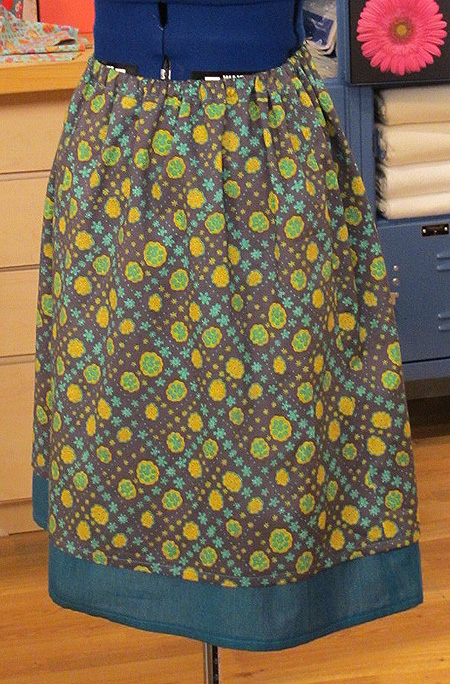
This skirt is a modern nod to mother/daughter dressing. This hip skirt features a 2-layered skirt with elastic waistbands. Not in the mood for 2-layers? Well, just make it a single layer then. This skirt is easy as pie and would be a fun project for mothers and daughters to sew together.
Fabric and Materials Needed
Note: This skirt is best suited for lightweight cotton, linen or silk fabrics. If making the skirt with one layer, you can try it with a medium weight fabric. The fabric amounts listed below are based on fabric that is at least 44 inches wide.
For adult skirts, you will need 1.25 yards of fabric for overlay and 1.5 yards of fabric for underskirt and up to 1.5 yards of ½ inch non-roll elastic
For child skirts, you will need 1 yard of fabric for the overlay and waistband and 1.25 yards of fabric for the underskirt. Also, you will need up to 1 yard of ½ inch non-roll elastic.
For adult and child skirts, you will need coordinating thread, scissors, pins, seam gauge, 2 safety pins and an iron. Also, download the pattern for the skirt from www.itssewasytv.com
Directions
Step 1: Download and cut out pattern from www.itseweasytv.com and print out pattern. If using a home printer, you will need to tile and assemble the pattern. Alternatively, you can take the file in to a print show that can print on wide-format paper and have them print out the full scale pattern for you.
Step 2: Fold your fabric in half lengthwise so that it is double layered. Pin the pattern pieces to the fabric and cut them out. You should have two pieces for the skirt overlay and two pieces for skirt underlay and two pieces for the waistband.
Step 3: With right sides facing, pin the two skirt overlay pieces together along the side seams. Sew these seams using a ½ inch seam allowance. Serge or zigzag the raw edge of these seams. Turn the hem under 1 inch (check with a seam gauge) and iron in place. Then turn the raw edge under so that you have a clean edge. Press this firmly in to place. Place a few pins along this folded edge to keep in place as you sew it down. Sew this hem using a straight or decorative stitch.
Step 4: With right sides facing, pin the two skirt underlay pieces together along the side seams. Sew these seams using a ½ inch seam allowance. Serge or zigzag the raw edge of these seams. Turn the hem under 1 inch (check with a seam gauge) and iron in place. Then turn the raw edge under so that you have a clean edge. Press this firmly in to place. Place a few pins along this folded edge to keep in place as you sew it down. Sew this hem using a straight or decorative stitch.
Step 5: With right sides facing, pin two waistband pieces together along the two side (shortest) seams and then sew these two seams using a ½ inch seam allowance. Serge or zigzag the raw edge of these side seams. Next fold each of the two long raw edges under ½ inch towards to the center and press firmly. Now fold the waistband tube that you’ve just created in half along the widest part. Press firmly. Set aside.
Step 6: Turn the skirt overlay and the skirt underlay so that the right sides of the fabric are facing out. Place the overlay completely over the underlay, matching up the side seams. Do this by inserting the underlay into the underlay so that the top waist is touching with the wrong side of the overlay on top of the right side of the underlay. Pin in place and baste stitch ¼ inch in from the raw edges so that they don’t shift while attaching the waistband casing.
Step 7: Pin one long raw edge of the waistband to the skirt, lining up the side seams and sew in to place using a ½ inch seam allowance (you should have a crease here from where you ironed it in step5. Now bring the remaining folded edge down and pin along the seam line. Pin in place and topstitch down, leaving a 1 inch opening for inserting the elastic.
Step 8: Cut a piece of ½ inch non-roll elastic 1-inch shorter than the waist measurement. Place a large safety pin on both ends of the elastic. Thread one end through the casing until you reach the other side of the opening. Pull through and stitch the elastic closed using a lap stitch.
Step 10: Top stitch the opening closed. Stitch a tag or piece of elastic at the center back waistband to designate the skirt back.
For more information visit www.shereesalchemydesigns.com
Sewing Machine Featured in this Segment:
Innov-is 40 Project Runway Limited Edition Sewing Machine
|