Flange Edge Pillow
22" x 22"
by Valori Wells
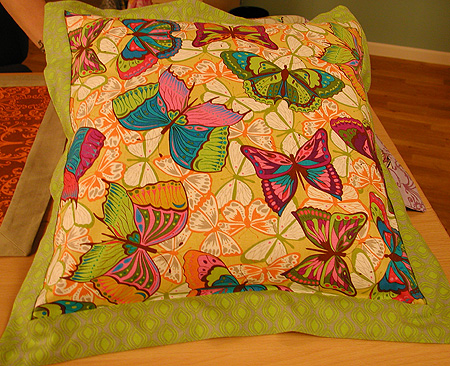
This stylish pillow uses two different fabrics, one for the pillow area and one as a decorative flange edge finish. The back has two overlapping pieces of fabric so the pillow form can easily be removed for laundering.
Supplies Needed:
18" Pillow Form
5/8 yd pillow fabric
3/4 yd flange fabric
Matching thread
Cutting Instructions:
From the pillow fabric cut one 19" square for the front and two 12" x 19" rectangles
From the flange fabric cut eight 3" x 24" rectangles (The flange ends will be trimmed later.)
Sewing Instructions:
Use 1/2" seam allowance throughout.
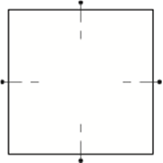
1. On the wrong side of the pillow front fabric put a dot in each corner 1/2" from the corner.

2. Fold the pillow in half and put a pin on the fold line. Repeat for each side of the pillow.
3. Fold one of the flange pieces in half and place a pin on the edge of the fold.

4. Place the right side of the pillow and the right side of one of the flanges together matching the pins. Pin together. Pin the layers together at the corners. The flange fabric will extend beyond the ends of the pillow fabric.
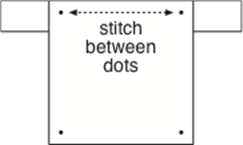
5. Begin stitching at the dot at one end of the pillow. Back tack to secure the stitches. Stitch to the other end and back tack. Repeat on all four sides of the pillow. The flange fabric will hang loosely at each of the corners. Press the seam allowances toward the center of the pillow.
6. Mitered Corner: At one of the corners lay the two flange fabrics on top of each other, with the bunched up pillow fabric to the right. Fold the flange fabric at a 45 degree angle from the corner dots to the outer edge. Press in the fold.
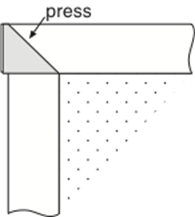
Holding the flange pieces together put two pins in it. Stitch from the dot to the outer edge of the flange back tacking at each end. Trim the excess fabric to a 1/2" seam allowance.

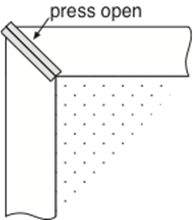
Press seam open. Trim any fabric that extends beyond the edges of the flange. Finish all four corners pressing each. Place the pillow on the ironing board and press the pillow seams toward the flanges.
7. Hem one side of each of back pieces on the 19" edge. Fold under the edge a scant 1/4", press, fold again 1/4" encasing the raw edge. Top stitch. Press.
8. Place the two backs on a flat surface with right sides up. Overlap the two hemmed edges until it makes a 19" square. Pin the overlapped edges together. Top stitch to secure.
9. Add the flange strips to each side of the pillow back as you did with the pillow front.
10. Place pillow front and back right sides together. Pin around the edges. Stitch around all of the edges. Trim excess fabric from the corners. Turn to the right side. Press outside edges together.
11. Pin the front and back pillow together with the flange seams on top of each other. From the pillow top top stitch the layers together. As you stitch around overlap the top stitching 1/4" at the end.
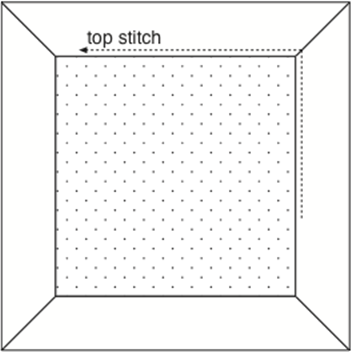
Insert the pillow form and you are ready to decorate!
For more information visit: www.valoriwells.com .
Featured sewing machine in this segment:
Sewing Machine Featured in this Segment:
Innov-is 40 Project Runway Limited Edition Sewing Machine

|