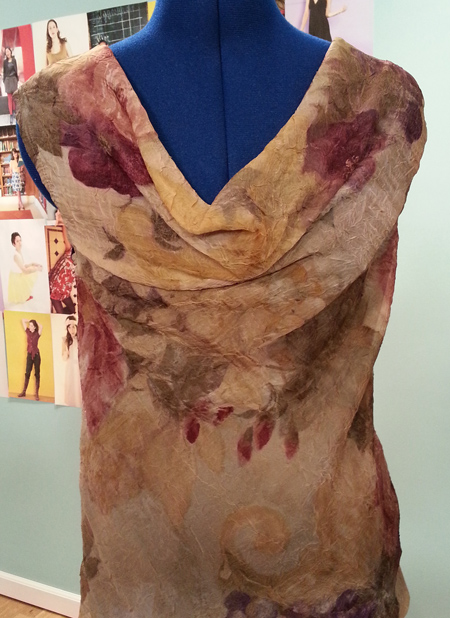
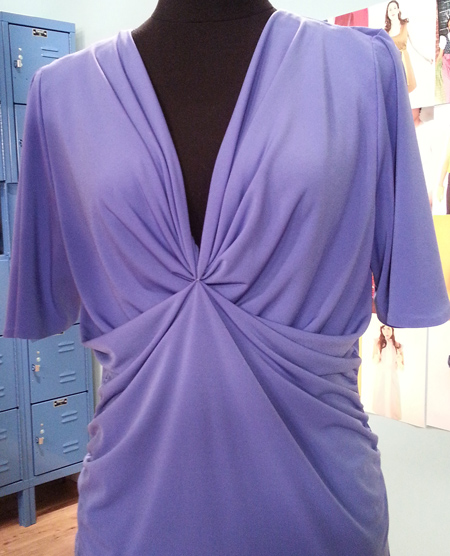
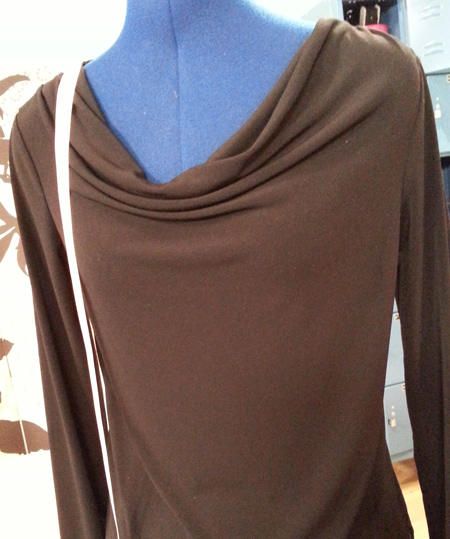
ANY basic T-Shirt or knit top pattern can be used to create a classic, fashion-forward 'cowl' neck design with EZ-to-do flat pattern techniques as taught by Londa in her 'Captivating Cowl' Talking Pattern™

Assemble Supplies
1. Simple knit top pattern
2. Pattern Paper - Medical Pattern Tissue Paper Roll or Red Dot Tracer.
3. Tape measure, Rotary ruler, cutter, and mat
4. Frosted adhesive tape in a dispenser
5. 2 colors of markers
Prepare Pattern & Determine Cowl Length
1. Trace Front pattern piece with 1/2" seam allowance onto pattern paper. Be sure to trace the seam line at shoulder and armhole.
2. Establish Neck Point on Front where the neckline and shoulder seam lines intersect. Clearly mark with a large circle in a color.
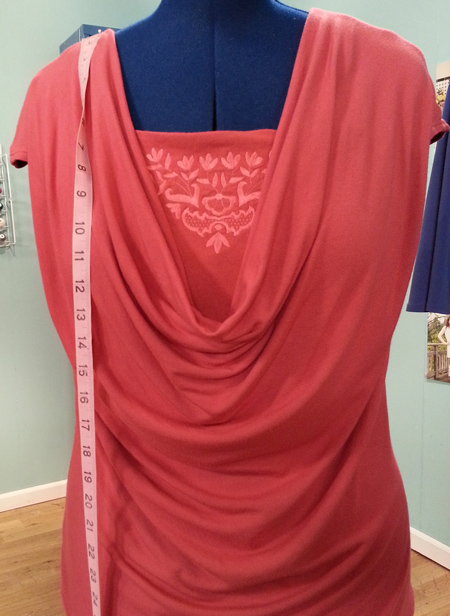
3. Determine Cowl Length desired by placing a tape measure at this point on your body and letting 'hang' in a loop to the desired drape amount. Note this full measurement. Calculate HALF of this measurement. ____" . On the pattern, this length will become the measurement from the Neck Point to the center front line of the Front pattern.
Flat Pattern Technique
As lines are drawn, be sure each intersects the pattern lines at a 90 degree angle.
1. Draw in a new lower neckline if needed - approximately 2.5" lower at center front than a normal, 'high', jewel neckline.
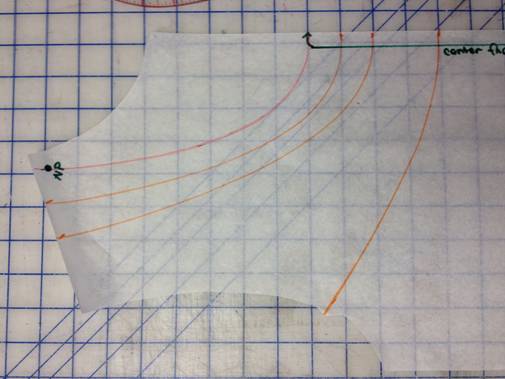
2. Draw 3 arc lines as follows - but the EXACT location and the shape is NOT important.
- 1" from the Neck Point at the shoulder to 1" down from the new, lower neckline at center front.
- 2" from the neck point at the shoulder to 2" down from the new lower neckline at the center front.
- 3" from a location close to the front sleeve notch along the armhole to 4" down from the new lower neckline at the center front.
3. Cut away the excess 'old' neckline at center front by cutting along the new lower neckline.
4. Reinforce the seam lines at the shoulder and armhole where the ark lines intersect by placing frosted adhesive tape over the seam lines.
5. Slash the seam allowances at each of these locations from the cutting line TO BUT NOT THROUGH the seam line.
6. Slash along all 3 of the arc lines drawn from the center front to the seam lines, LEAVING A TINY HINGE AT THE SEAM LINES.
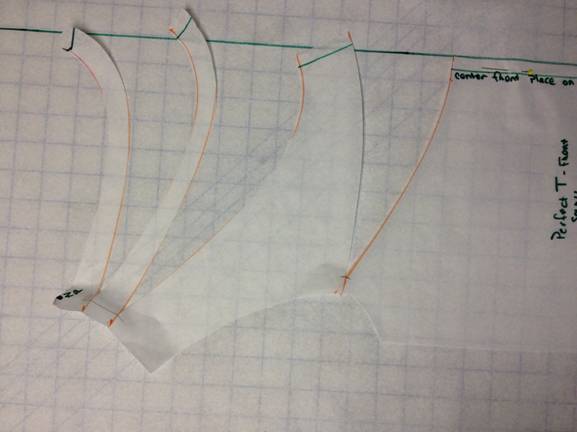
7. Slide a LARGE piece o pattern paper underneath the work. Extend the center front line for 5" or so along the center font onto this new, incased size tissue. Anchor the lower center front to the tissue at the hemline edge with a pin.
8. Spread the 3 slashed arc lines, swinging from the seam line hinges until...
- the new lower neckline is almost perpendicular to the center front
- the shoulder line is almost vertical, and parallel to the center front
- the Cowl Line measures the amount determined above in Step 3 of Prepare Pattern & Determine Cowl Length.
Tape all into place.
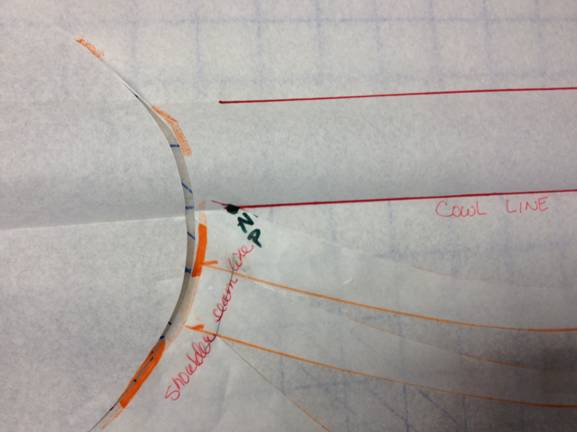
9. With a marker, CLEARLY draw the Cowl Line from the Neck Point to the center front, intersecting the center front at a 90 degree, perpendicular angle.
10. To create the Cowl Facing, draw another line 2" higher than the Cowl Line.
11. To create the 'weird shape' of the Cowl Facing along the shoulder cutting line fold down the Cowl Facing along the Cowl Line. Cut along the shoulder cutting line. Open to see the 'weird shape'.
12. For longer Cowl Lengths than appear possible by cutting and spreading as above, do the most possible according to the above directions, but then ALSO pivot entire pattern from center front lower hemline to achieve desired Cowl Length. True' pattern at lower hem line.
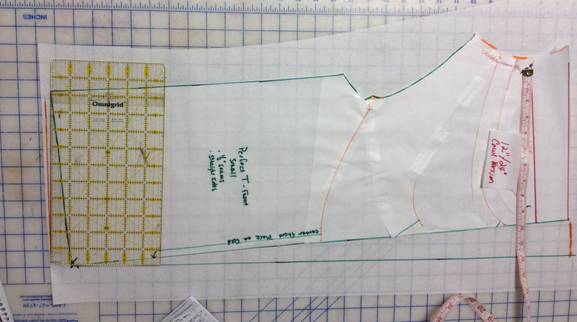
13. Clearly mark this pattern with the Cowl Length.
See Londa's Captivating Cowl Pattern for specific Cowl Lengths and creative designs, construction techniques utilizing Clear Elastic in the back neckline, and much more.
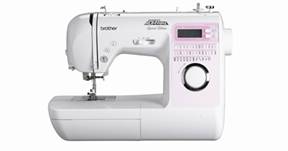
Sewing Machine Featured in this Segment:
Innov-is 40 Project Runway Limited Edition Sewing Machine
With Zig Zag “J” Foot
|