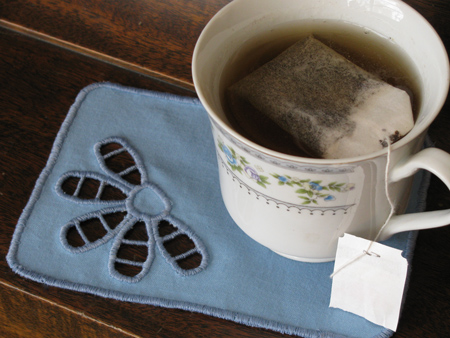
Cutwork Coaster
by Rebecca Kemp Brent
Finished Size: 4" x 6"
Materials
6" x 8" rectangle of cotton broadcloth
6" x 8" rectangle of iron-on tear-away stabilizer
4" square of water-soluble stabilizer
Matching all-purpose thread
This Pattern(PDF)
Transferring the Design
Use a pencil or pen to trace the pattern onto the tear-away stabilizer, centering the design. A water-soluble marker can be used, but isn't necessary.
As an alternative, begin with an 8 1/2" x 11" piece of tear-away stabilizer and use your inkjet printer to print the design directly onto the stabilizer. Set the printer for Draft mode or the setting which deposits the least amount of ink on the paper. Place the stabilizer rectangle in the paper tray and print.
Be sure to set the scaling options to None when printing the pattern with Adobe Reader.
Instructions
1. Following the manufacturer's instructions, iron the stabilizer onto the fabric wrong side. The printed design will be on top of the stack, with the fabric's right side on the bottom.
2. Set the machine for a straight stitch 1.6 mm long and sew along all the design lines except the straight lines that cross the petals. Pin the water-soluble stabilizer to the stabilizer side of the project, covering the flower.
3. Stitch around the design twice more, sewing just inside and just outside the original stitches.
4. Transfer the locations of the Richelieu bars (the straight lines across the petals) from the original pattern to the water-soluble stabilizer.
5. Working from the right side of the fabric, carefully cut out one petal of the design. Be careful to cut only the fabric layer. Remove the tear-away stabilizer through the opening in the fabric.
6. Begin stitching around the petal again on the original design line. At the first Richelieu bar location, pivot and stitch across the open area, sewing only on the water-soluble stabilizer. Sew across the outline stitches on the far edge of the petal, then backstitch across the opening to return to the bar's starting point. Sew back and forth along the same line 2 1/2 times, total, ending on the far side of the petal.
7. Set the machine for a zigzag stitch 1.5 mm wide and 0.3 mm long. With the needle down, pivot the work so the line of straight stitches is centered on the presser foot. Zigzag along the Richelieu bar, covering the straight stitches completely.
8. When you have returned to the bar's starting point again, reset the machine for a straight stitch 1.6 mm long and continue stitching around the petal. Repeat the preceding steps to make the second Richelieu bar, then continue with straight stitches to the end of the petal. Cut the threads.
9. Set the machine for a satin zigzag stitch 3.0 mm wide and 0.3-0.4 mm long. Sew around the petal, overcasting the raw edges, covering the straight stitches and the ends of the Richelieu bars.
10. Repeat the cutting and stitching steps to make the other four petals on the flower.
11. Use the same satin zigzag to stitch the outline of the flower center, but do not cut away any fabric. The stitches should cover the ends of the petals' zigzag outlines. Secure the thread tails and cut.
12. Gently cut away as much of the water-soluble stabilizer as possible. Be careful not to dislodge any stitches. Tear away the stabilizer outside the rectangular line of stitches, and cut away the excess fabric outside the rectangle.
13. Set the machine for a satin zigzag stitch 5.0 mm wide and 0.3-0.4 mm long. Sew around the outer edge of the coaster, overcasting the raw edges.
TIP: If your machine has an overcasting foot with a metal finger designed to prevent tunneling, this is a great time to use it.
14. Tear away the remaining stabilizer on the back of the coaster. Follow manufacturer's instructions to remove any water-soluble stabilizer that remains. Lay the coaster right side down on a thick towel and press carefully to avoid flattening the embroidery.
For more information visit www.rkbrent.com
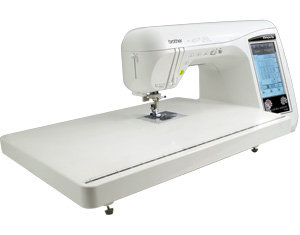
Sewing Machine Featured in this Segment:
Innov-ís NX2000 Laura Ashley® Limited Edition Sewing Machine
With Open Toe Embroidery Foot
|