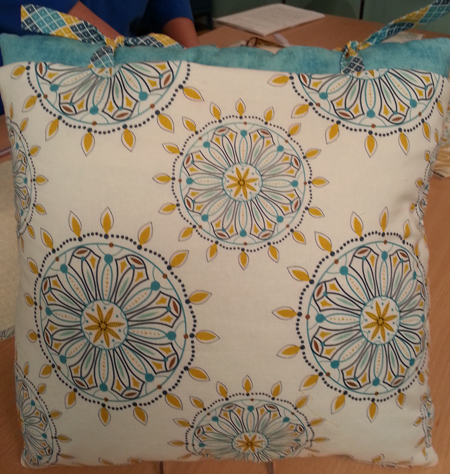
Pillow Sacks
Donna Babylon
Donna@MoreSplashThanCash.com
Materials Needed
1 craft size package of Warm & Natural batting
½ yard fabric for pillow*
½ yard coordinating fabric for sack*
1/8 yard coordinating fabric for ties*
fabric marker*
point turner*
16” pillow form
Dritz Pillow Corner Template**
Dritz Home Decorator’s Pins**
Thread to match fabric
* Fabrics courtesy of Riley Blake Designs, “Indie Chic” by My Mind’s Eye™
**available from MoreSplashThanCash.com
Use ½” seam allowance unless otherwise directed.
Pillow
- From the pillow fabric and batting, cut two squares, each 17”.
- Place the batting on the wrong side of each fabric square. Align all edges.
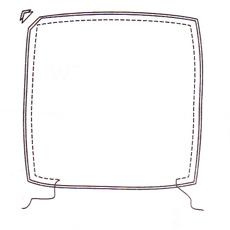
- Using the corner template, redraw each corner so they are tapered. Note the corner turn point as indicated on the template.
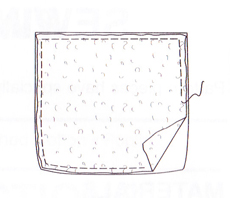
- Stitch around the entire pillow cover; leave a 12-inch opening on one side for turning and for inserting the pillow form. Double stitch the corners for reinforcement. Diagonally trim the fabric away from the corners (fig. 1).
Optional: Zigzag stitch or serge with an overlock stitch the seam allowances.
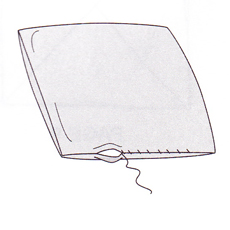
- Turn the pillow right side out. From the inside, and using a point turner, push the fabric out from each corner until it looks nice. Insert the pillow form and hand stitch the opening closed (fig. 2).
Pillow Sack
- From the sack fabric and batting, cut two rectangles, each 17” by 15”. From the same fabric also cut two rectangles, each 17” by 6”. For each pair of ties, cut 2 strips, each 2 ¾” by 10”.
- Place the batting on the wrong side of each sack piece. Align all edges. Baste (fig. 3).
- Pin sack pieces right sides together. Using the corner template, redraw each corner so they are tapered. Note the corner turn point as indicated on the template.
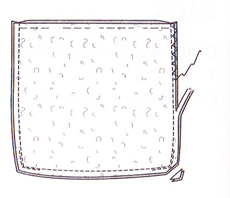
- Stitch around three sides of the sack; leave the top edge open. Double stitch the corners for reinforcement. Diagonally trim the fabric away from the corners (fig. 4). Optional: zigzag stitch or serge with an overlock stitch the seam allowances.
- Turn the sack right side out. From the inside, and using a point turner, push the fabric out from each corner until it looks nice.
- For each tie, fold the tie strip in half lengthwise with the right sides together. Stitch, using 3/8” seam allowance, leaving one end open. Cut the corners diagonally and turn ties right side out (fig. 5). Press each tie smooth and flat.

- Pin ties where desired to outside of sack. Make sure the corresponding tie line up on the opposite side of the sack. Baste in place (fig. 6).

- Stitch facing sections right sides together. Press open seam allowances. Finish the lower edge with a either a zigzag stitch or an overlock stitch on the serger (fig. 7).
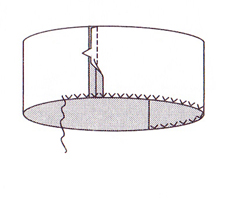
- Pin the facing to the sack with the right sides together; match the side seams. Stitch (fig. 8).

- Press the seam allowance toward the facing. Understitch by stitching through the facing and seam allowances close to seam. This prevents the facing from rolling to the outside.
- Turn the facing to the inside and press. Tack the lower edge of the facing to the seams (fig. 9).

- Insert the pillow into the sac. Tie ties into a square knot or bows (fig. 10).


Fig 1

Fig 2

Fig 3

Fig 4
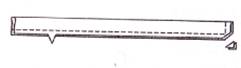
Fig 5
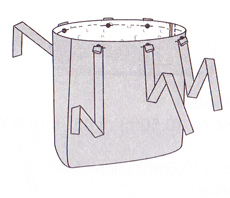
Fig 6

Fig 7
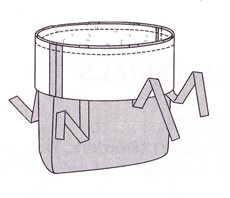
Fig 8
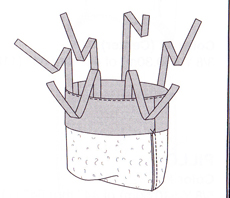
Fig 9
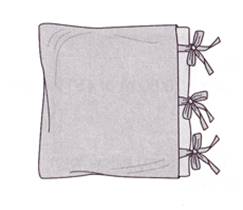
Fig 10
Sewing Machine Featured in this Segment:
Innov-ís NX2000 Laura Ashley® Limited Edition Sewing Machine
With Zig Zag “J” Foot
|