Hey Cinderella!
Embroidery Products
Adorable Ideas’ Vintage Lace Edition 4 Vol 4. AIML18, AIMR14A, Aim143, Aspm039 and Aspm049 available at www.adorableideas.com
Materials
Aleene’s Fabric Fusion Permanent Adhesive
Clover Wonder Clips, clothespins or binder clips
Disposable sponge brush, paper plate
Water soluble stabilizer – mesh
Glad Press n Seal (optional)
Painter’s tape (optional)
Satin or linen pumps
Crystals, studs or pearls (optional)
Hot-fix tool (optional)
Step 1. Go Shoe Shopping
The key to success is finding the right shoe, Cinderella! Use these four points to know when you find the perfect pair.
Heel height - Only you know how high you can go.
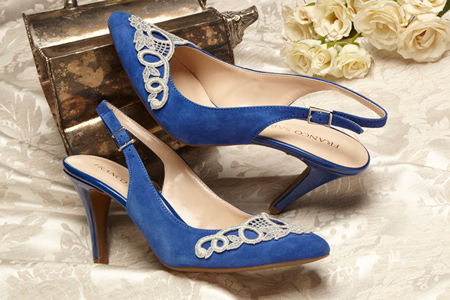
Color – The lace you add can change the overall color of the shoe so don’t be too picky on the shoe color. You can tone down a brilliant blue, punch up a plain beige and enhance a winter white by choosing a thread that contrasts with the shoe – either to soften or separate.
Style - Since you’re adding embellishment, it’s best to start with a blank canvas. Skip the rhinestones, studs, feathers, fringe and beads. You can always add them later to the embroidery but they are quite tricky to work around when applying adhesive.
Comfort - This is probably not a shoe for everyday wear so go ahead and try a shoe that’s a bit more daring than normal – higher heel, sling back, open toe and the like. These shoes are what I call dinner shoes – wear them in the car, to walk through the restaurant and then sit down.
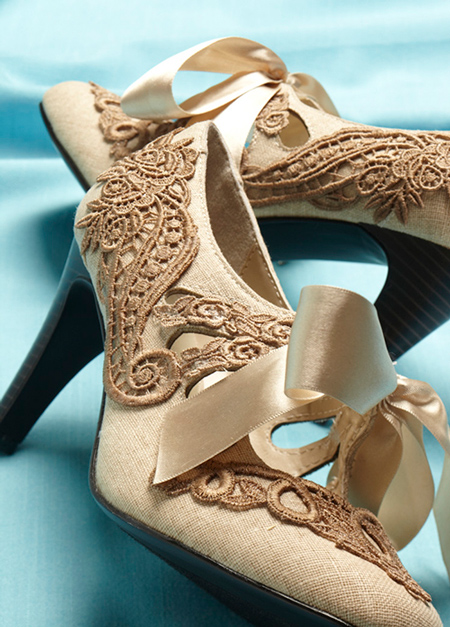
Material – I auditioned my lace on a variety of surfaces: leather, suede, canvas, silk and linen. I found the contrast between the leather and lace made the shoes look cheap. So I scrapped that. I loved, really loved the lace on suede BUT you get a one shot chance when applying the lace to the suede. The adhesive destroys suede’s delicate nap so if you misjudge placing the lace on the shoe, you’ve probably ruined the shoe. Too much pressure for me – especially since I loved that pair of suede shoes!
Fabric shoes – canvas, linen and silk are a lovely base for lace and easy to work with. If you apply the adhesive in the wrong place, the adhesive dries clear without leaving a mark – very forgiving for newbie cobblers.
Step 2. Make the Lace
You’ll need lace designs that will fit the small areas of a shoe. Start by printing templates of the lace and auditioning them on the shoe. Cut the templates paper doll style
Place them on the shoe to see how they fit. You’ll know right away what works and what doesn’t.
Since almost all lace designs are digitized with an artistic hand, don’t count on resizing. You’ll find even the best software programs cannot resize a free-standing lace design without losing some integrity of the design. My rule for stitching lace is, if it doesn’t work in the original size, look for another lace design.
Once you find designs that fit your shoe, hoop two layers of water soluble mesh stabilizer and stitch the first design. Even though you’ve done the template audition, there’s nothing like seeing the actual lace on the shoe. When selecting the thread, keep in mind the thread will appear a bit darker than its original shade once it’s stitched. So stitch just one design, rinse away the stabilizer and let dry. Once almost dry, press the lace. This is one time when having some stabilizer remain in the embroidery is a good thing – it will provide shape to the lace during the application process.
Now audition the lace on the shoe. Is the color right? Does it fit the area? Will it obscure movement of the foot or ankle (for heaven’s sake – don’t make the shoes MORE uncomfortable!). If you’re satisfied, stitch the mirror-imaged match for the other shoe.
If you are placing more than one lace design on the shoe – stitch them all now from the same spool of thread. It’s very tempting to stitch all of the repeats for the shoes (on the beige shoes that was six designs) in one large hoop. But that’s not always a good idea. You’ll get the best stitch-out when you use the smallest hoop for the design – especially lace. Once that water soluble stabilizer is removed, the stitches can fall apart if the elements of the design are not stitched properly. I had satin stitches separate from portions of the lace because the tension on the stabilizer was too loose in my big hoop. So do as I say and not as I did! Use a small hoop – you’ll be better for it in the long run.
Step 3. Decorate the Shoe
Protect the areas that will not receive any decoration such as the bow on the beige shoe. I used a clip to hold the satin bow out of harm’s way.
Squirt a dollop of adhesive on a paper plate and load the sponge brush with the glue. Refer to the manufacturer’s instructions for permanent adhesion. Place the lace, wrong side up, on the plate. Generously apply the glue to the wrong side of the adhesive. Place the lace on the shoe – pressing the lace onto the surface. Hold the lace in place for a few minutes. Carefully remove your hand. Clamp the edges of the lace to the shoe if possible.
Repeat for the other shoe duplicating the position of the lace in mirror image. Keep the lace clamped to the shoe for several hours. It’s okay to occasionally open the clips to release any glue.
If you can’t use clips or clothespins (lace is too far away from the edge of the shoe), then use Glad Press N Seal or painter’s tape. Place the Press n Seal on the lace and pull it tautly across the surface, wrapping the seal to the sole.
Use a second piece to wrap another area.
This will add pressure to the lace and adhesive resulting in a stronger hold. After several hours, carefully remove the Press n Seal.
If you’d like, add crystals, studs or pearl with a hot-fix tool. Now go find your handsome prince and enjoy!
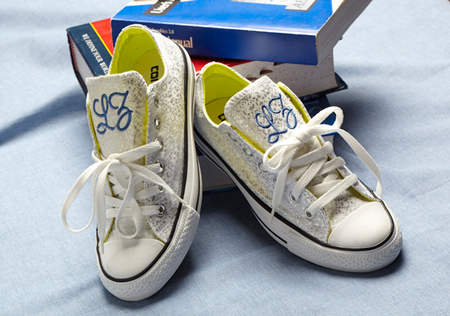
Monogrammed Sneakers
By Eileen Roche
Materials
One pair of sneakers
Tear-away adhesive stabilizer
Monogram lettering designs (built-into the machine or software generated)
Step 1. Prep
Hoop tear-away adhesive stabilizer. Remove the protective paper and set the hoop aside.
Measure the design area at the top of the tongue. Use this measurement to create your lettering. Once you’ve selected your monogram, make sure it will fit on the tongue with an open border around the monogram. If you created the monogram in software, print a template of the monogram and audition it on the tongue. Make any necessary adjustments and send it to the machine.
Step 2. Stitch
Now for the fun part! Remove the laces from the shoe. Place the tongue on the sticky stabilizer, working it away from the shoe. Make sure the design area is completely flat on the stabilizer. Carefully lift the hoop and attach it to the machine. Sit at the embroidery during the embroidery process to make sure the shoe does not fall into the needle area. Stitch the design. Repeat for the opposite shoe.
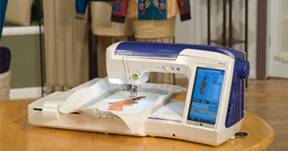
Sewing Machine Featured in this Segment:
Quattro 2 – 6700D - Sewing, Quilting, Crafting and Embroidery Sewing Machine
With Embroidery Foot
|