Precutting Appliqués – Cindy Hogan
Materials needed:
Brother ScanNCut machine
Embroidery software
Printer
Double sided adhesive stabilizer

Instructions:
- Open your embroidery software.
- Choose the Cut line and copy or cut it into a new design page. Different software programs do this in different manners, so consult your software instructions.
- Change the color of the stitch to black.
- Click Print Setup.
- Make sure you are printing actual size.
- If possible, turn off any grid and axes functions (you just want the design not any alignment features).
- Choose Print.
- The design will print.
- Use the print to scan into the ScanNCut to cut the appliqué pieces.
- Take the print to the ScanNCut
- Scan to Data
- Crop the area that you wish to cut.
- Save into the machine’s memory.
- Choose Home and then choose Cut.
- Choose Saved Data and then machine.
- Select the design.
- Follow the instructions to cut.
- Place the double adhesive backed black fabric onto the cutting mat and cut the dress pieces.
- Embroider the appliqué as usual when it is time to place the appliqué piece on the fabric, press it into place while it is still in the hoop.
If you do not have a cutting machine, you may print out the templates and turn the printout upside down. Trace to the back side of the adhesive backed stabilizer paper after it has been ironed onto the fabric and then manually cut.
You may also cut the fabric as usual after the appliqué fabric has been tacked onto the project, cut the outer edge of the appliqué away.
For more information visit: www.cynthiasembroidery.com .
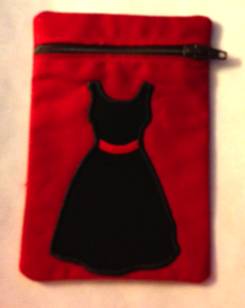
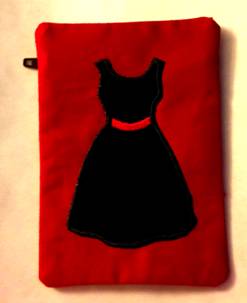
Little black dress in the hoop change purse – Cindy Hogan
Materials needed:
Brother ScanNCut machine
Embroidery software this lesson uses PE-DESIGN NEXT (9.23)
Printer
5 x7 inch embroidery frame
1 piece of red fabric 5 x7 inches
2 pieces of red fabric 5 x 5 inches
1 piece of 5 x 7 inch black fabric with double sided adhesive ironed onto the back
Little black dress change purse designs (front and back)
7 inch zipper to match fabric
Instructions:
- Open Layout and Editing.
- Open the Little black dress change purse design back.
- Click on the Stitches Attributes Tab and choose Divide by Color.
- In the Sewing Order window, double click on the first piece of the dress appliqué (this is the cut line).
- Click on the Home tab and choose Cut.
- Send the embroidery design to the machine via your preferred method.
- Start a new session of Layout and Editing from the Start menu of the computer (do not close this session or choose new page).
- Press Paste to paste the cut line into the new Layout and Editing window.
- From the flower pull down menu (this is the file pull down menu), choose Print and then Print Setup.
- In the Embroidery Print Mode area, choose Actual Size and Realistic Stitch Image.
- Remove the checkmark if there is one in front of Print sewing area box and center axes and Print template grid. These items will interfere with the cut process on the Scan N Cut.
- In the Stitch image area, click on the Attributes button.
- Change the Thread Width to Thick, the Brightness to Dark and then click OK.
- Click Print.
- Choose Page 1 to 1. Page 2 is the design information.
- The design will print.
- Repeat the process for the Little black dress change purse back design.
- Use the print to scan into the ScanNCut to cut the appliqué pieces.
- Take the print to the ScanNCut and Scan to Data.
- Save into the machine’s memory.
- Place the double adhesive backed black fabric onto the cutting mat and cut the dress pieces.
- At the embroidery machine.
- Bring up the embroidery design.
- Hoop a piece of Tear away stabilizer in the 5 x 7 inch embroidery hoop.
- Embroider the first segment.
- Tape a zipper inside the side stitch lines with painters tape.
- Embroider the next 2 segments. They will stitch the zipper in place.
- Lay the top piece of 5 x 5 inch fabric along the top of the zipper flipped face side down over the zipper.
- Embroider the next stitch and then flip it to the top of the hoop.
- Lay the second piece of 5 x5 inch fabric face side down over the zipper and stitch the next segment flip to the opposite side.
- Finger press both pieces of fabric down.
- Embroider the next 2 segments.
- Open the zipper to the center of the embroidered lines.
- Stitch the next segment and then the appliqué segments.
- Remove from the embroidery machine.
- Hoop a piece of Tear away stabilizer in the 5x7 inch hoop.
- Place the 5 x 7 inch fabric on top of the hoop.
- Embroider the design until you reach the last stitch segment the rectangle.
- Place the front face side down on top of the embroidery matching up the basting stitch lines.
- Embroider the last segment.
- Remove the embroidery from the machine and trim to ¼ inch on all sides.
- Take a seam ripper and open the back of the tear away and turn the project through the zipper opening.
- Press.
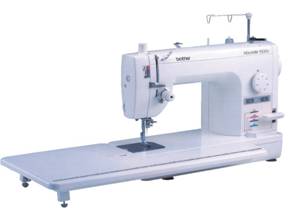
Sewing Machine Featured in this Segment:
Brother PQ – 1500s Sewing Machine
|