Nappy Nap Sack, Bed Roll & Pillow
22” X 30” X 1 1/2” Bed Roll, 22” X 18” Nap Sack & 9 1/2” X 14” Pillow
By Pearl Krush
A Pearl Louise Design
www.pearllouisedesigns.com
Materials Needed:
2 Yards Blue Print
1 ¼ Yards Green Print
1 ¼ Yards Home Foam Bed Roll
Fat ¼ Cream Tone on Tone Print
Fat 1/8 Brown Weave Print
Fat 1/16 Black Print
One Yard Steam A Seam 2 Lite
Basic Sewing Supplies
Travel Pillow Form (Cut in Half) Basic Instructions
1. Trace, “Fuse” and Cut out all appliqués as stated.
2. Cut all Fabrics as stated. WOF = Width of fabric (42”)
3. 1/4” seams are allowed
4. Press all seams.
Cutting Instructions:
Bed Roll
1. From the Blue Print, Cut:
Two 18 1/2” X 33 1/2” Rectangles (Bed Roll)
One 16 1/2” X 36 1/2” Rectangle (Nap Sack)
One 6 1/2” X 18 1/2” Rectangle (Pillow Case)
2. From the Green Print, Cut:
Two 4 1/2” X 18 1/2” Rectangles (Bed Roll Bottom)
Two 3 1/2” X 18 1/2” Rectangles (Bed Roll Top)
One 2” X WOF Strip (Bed Roll Tie)
Two 3 1/2” X 37 1/2” Rectangles (Nap Sack Top & Bottom)
Two 1 1/2” X WOF Strips (Bed Roll Ties)
One 10 1/2” X 18 1/2” Rectangle (Pillowcase)
3. Cut all Appliques as stated.
Building the Bed Roll
1. From the Home Foam, Cut:
One 17” X 40” Length
2. With right sides together, sew a 3 1/2” X 18 1/2” Green Print Rectangle to the top of the
18 1/2” X 33 1/2” Blue Print Rectangles. Repeat and sew the 4 1/2” X 18 1/2” Green
Print Rectangles to the bottom of each 18 1/2” X 33 1/2” Blue Print Rectangle.
3. Trace, “Fuse” and Cut all appliqués as stated. Place and press the appliqués in place on the lower front section made in Step #2. Stitch a decorative stitch around each appliqué.
4. Place the back and front sections of the bed roll cover right sides together. Sew the sides and top seams together. Leave the bottom open. Turn right side out.
5. Fold the raw edges on the 2” X WOF Strip to the center. Fold again. Top sew the outer edges together to make the tie.
6. Fold the tie in half. Fold the bottom opening on the bed roll cover under 1/2”. Pin the
fold of the tie inside the folded bottom edge on the top center.
7. Carefully insert the Home Foam Rectangle inside the cover. Pin the folded bottom seam together.
8. Place the bottom seam onto the sewing machine and top sew the seam shut.
Building the Nappy Nap Sack
1. Fold the ends of the 6 1/2” X 37 1/2” Green Print Rectangles 1/2” to the wrong side. Press.
2. With right sides together, sew the 6 1/2” X 36 1/2” Green Print Strips to the top and bottom of the 16 ½” X 36 1/2” Blue Print Rectangle.
3. Trace, “Fuse” and Press the appliqué onto the center of the bag. Stitch a decorative stitch around each appliqué shape.
4. Fold the top and bottom Green Print Rectangles under 1/4”. Fold again covering the seam. Sew in place.
5. Sew a seam 1” from the folded Green Print Cuff on each end. This will make the casing on the top and bottom of the bag.
6. Fold the bag wrong sides together. Sew the side seam. Do not sew into the casing spaces at both ends.
7. Fold the raw edges of the 1 1/2” x WOF Green Print Strips to the center lengthwise. Fold again and sew the folded edge together to make the two bag ties. Place a safety pin into one end of one tie. Tunnel it through the casing on the bottom of the bag allowing the ends of the tie to be exposed. Repeat on the top of the bag. Tie a knot into the end of each tie. Trim off any excess fabric to the knot.
Building the Pillowcase
1. With right sides together, sew the 6 1/2” X 18 1/2” Blue Print Rectangle to one end on the
10 1/2” X 18 1/2” Green Print Rectangle.
2. Sew the sides and bottom seams. Turn right side out.
3. Fold the bottom of the Pillowcase Cuff under 1/4”. Fold the folded edge over the seam and sew in place.
4. Insert the pillow. (I cut a regular travel sized pillow in half to get the 8” X 13” small
pillow).
Finishing:
1. Place the pillow in the Pillowcase. Place the pillow onto the Bed Roll. Roll the Bed Roll up and place it into the Nap Sack. Pull the Ties tight.
Enjoy! Pearl Louise
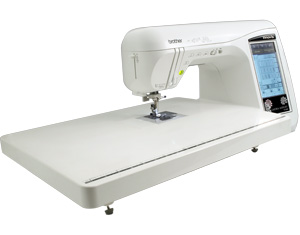
Sewing Machine Featured in this Segment:
Brother Innov-ís NX2000 Laura Ashley® Limited Edition Sewing Machine
|